June 2024
I had to create an App Clip for a project using React Native. There are people who have done it before, but info is now outdated so posting an updated guide.
Most of the steps come from this repo kudos to codibly and also all the amazing people that provide all the packages and guides for integrations between old-arch and new-arch.
@rnx-kit/react-native-host. It’s a package that allows to hoist a RCTRootView in the different architecturesyarn add @rnx-kit/react-native-host --dev
podfile # In your main app target add the following
# Auto linking is broken on this package
# https://github.com/microsoft/rnx-kit/issues/3208
pod 'ReactNativeHost', :path => "../node_modules/@rnx-kit/react-native-host"
target 'Clip' do
inherit! :complete
# Pods for Clip
end
cd ios && RCT_NEW_ARCH_ENABLED=1 pod install
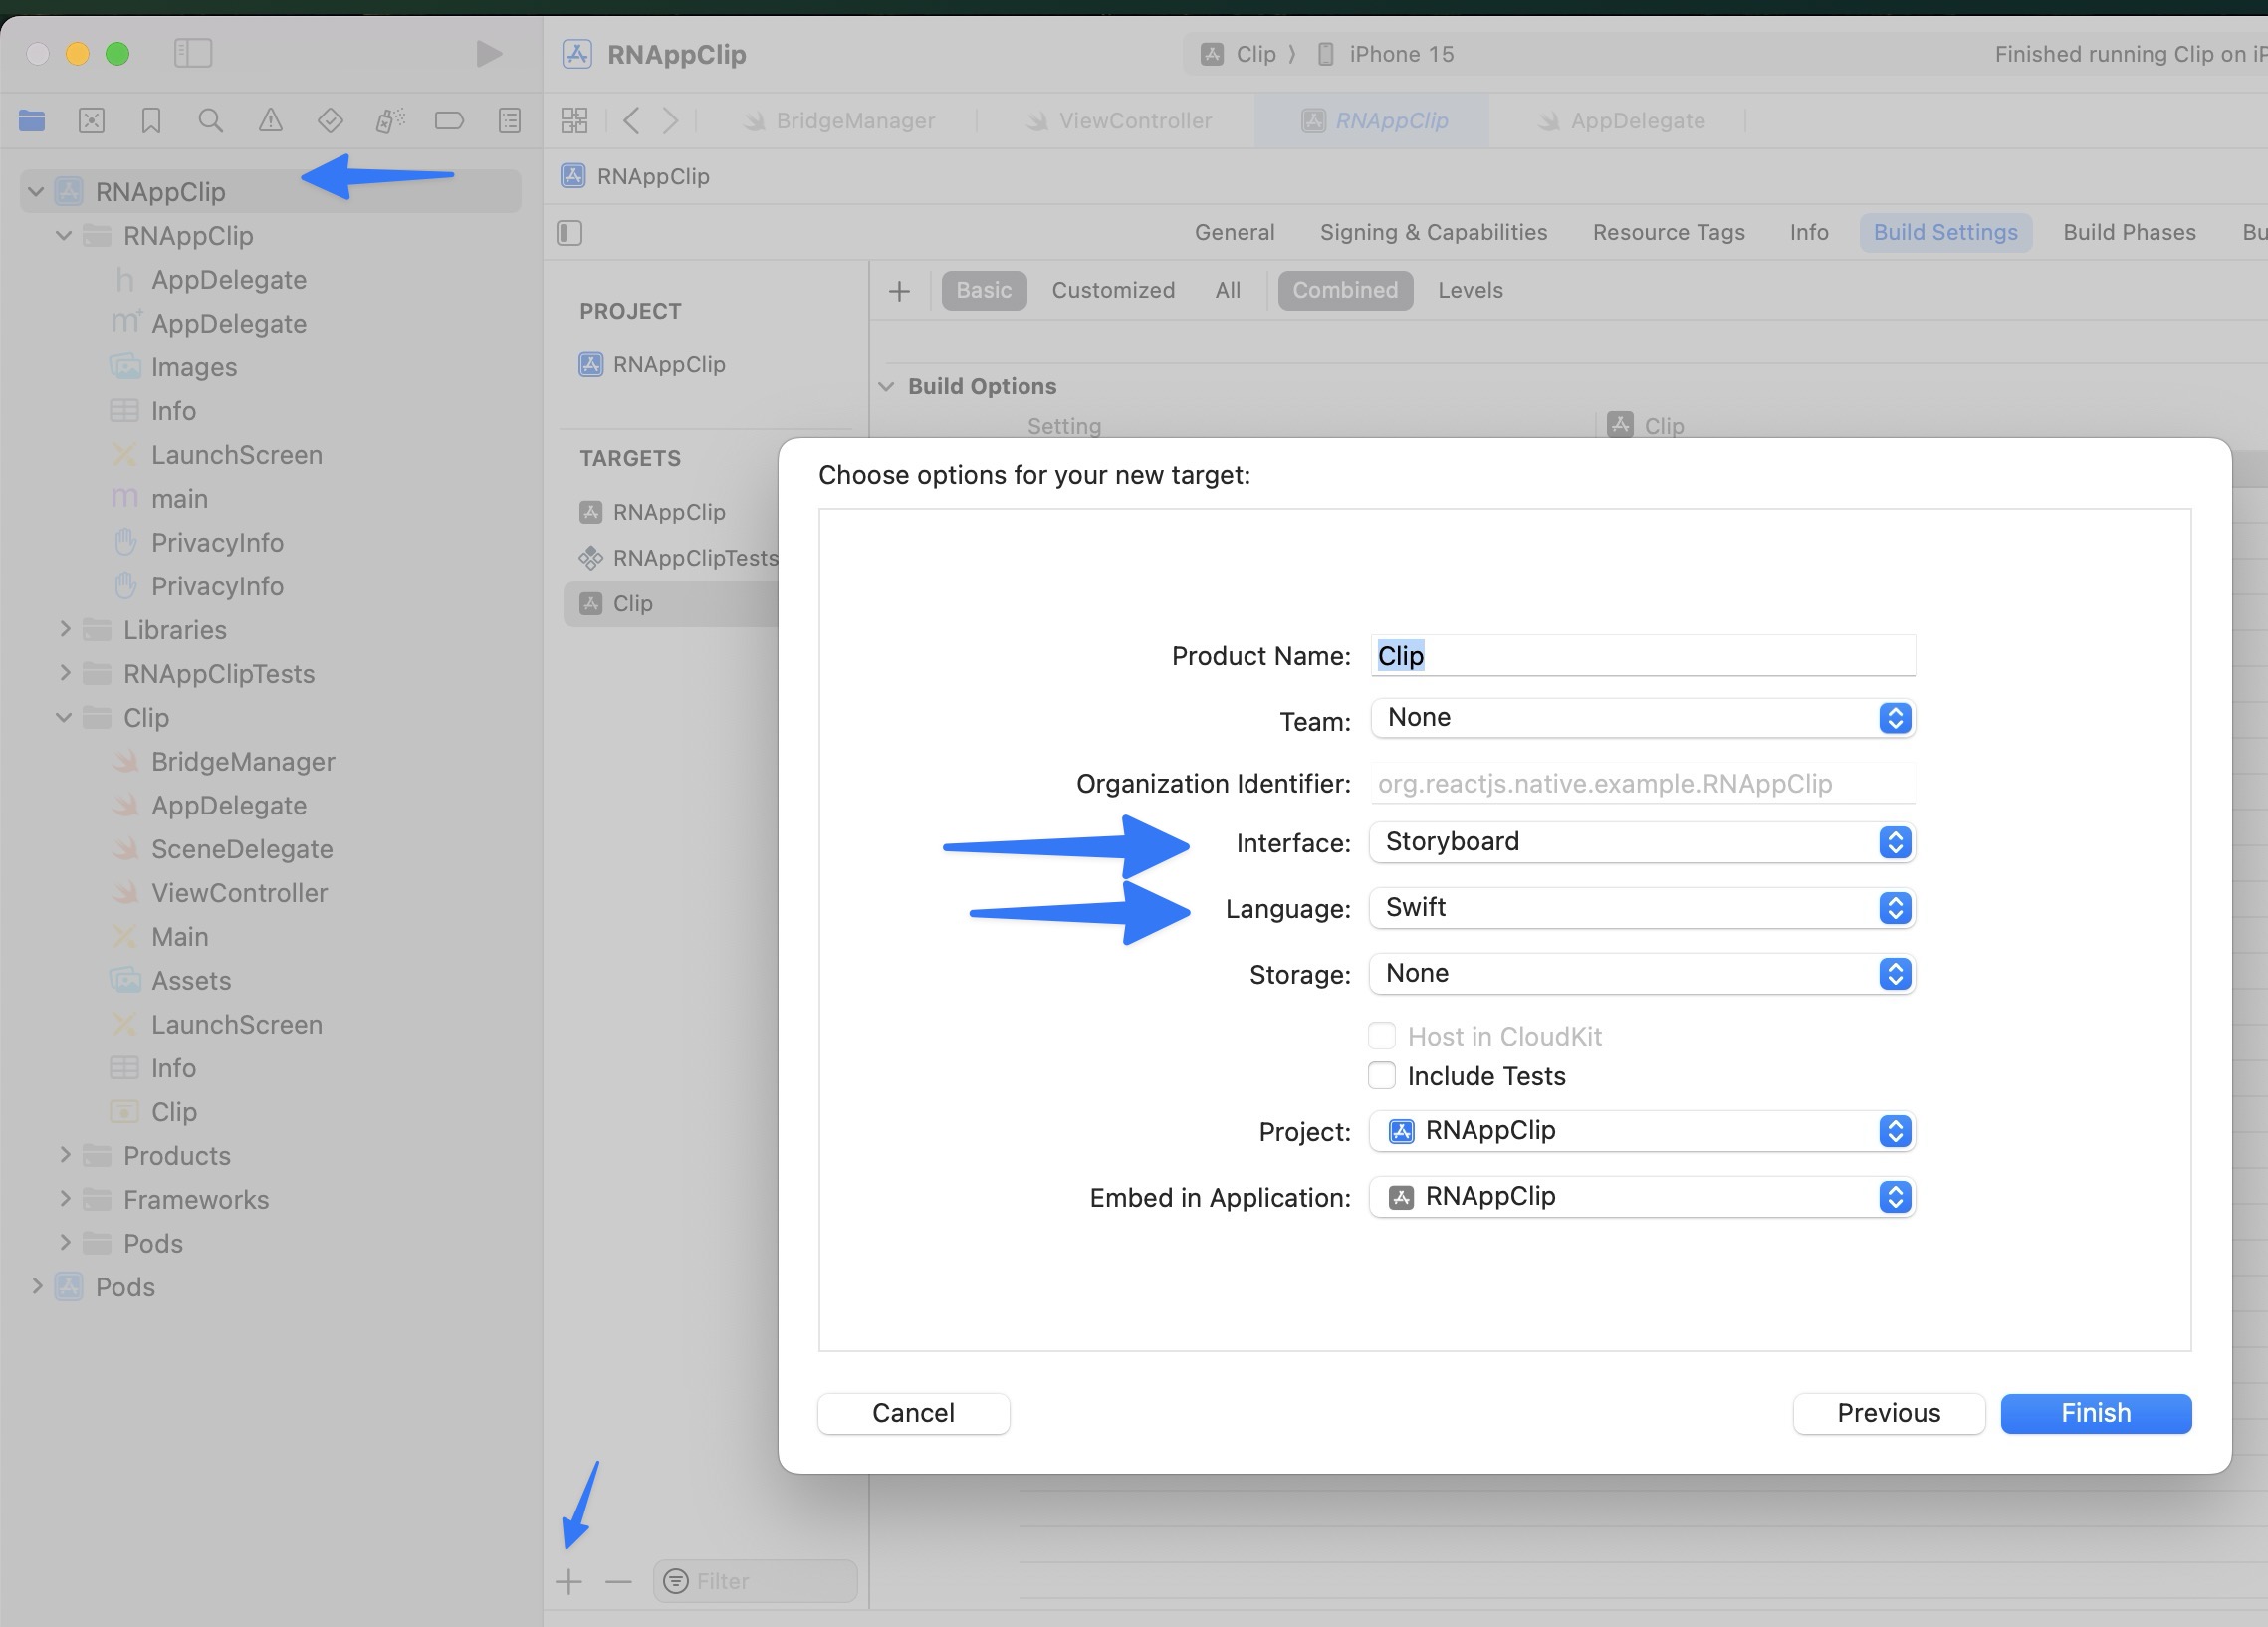
BridgeManager.swift class in the Clip target. Make sure it is added to the correct target! This class will help us instantiate a “host” which is compatible with the old arch and new arch.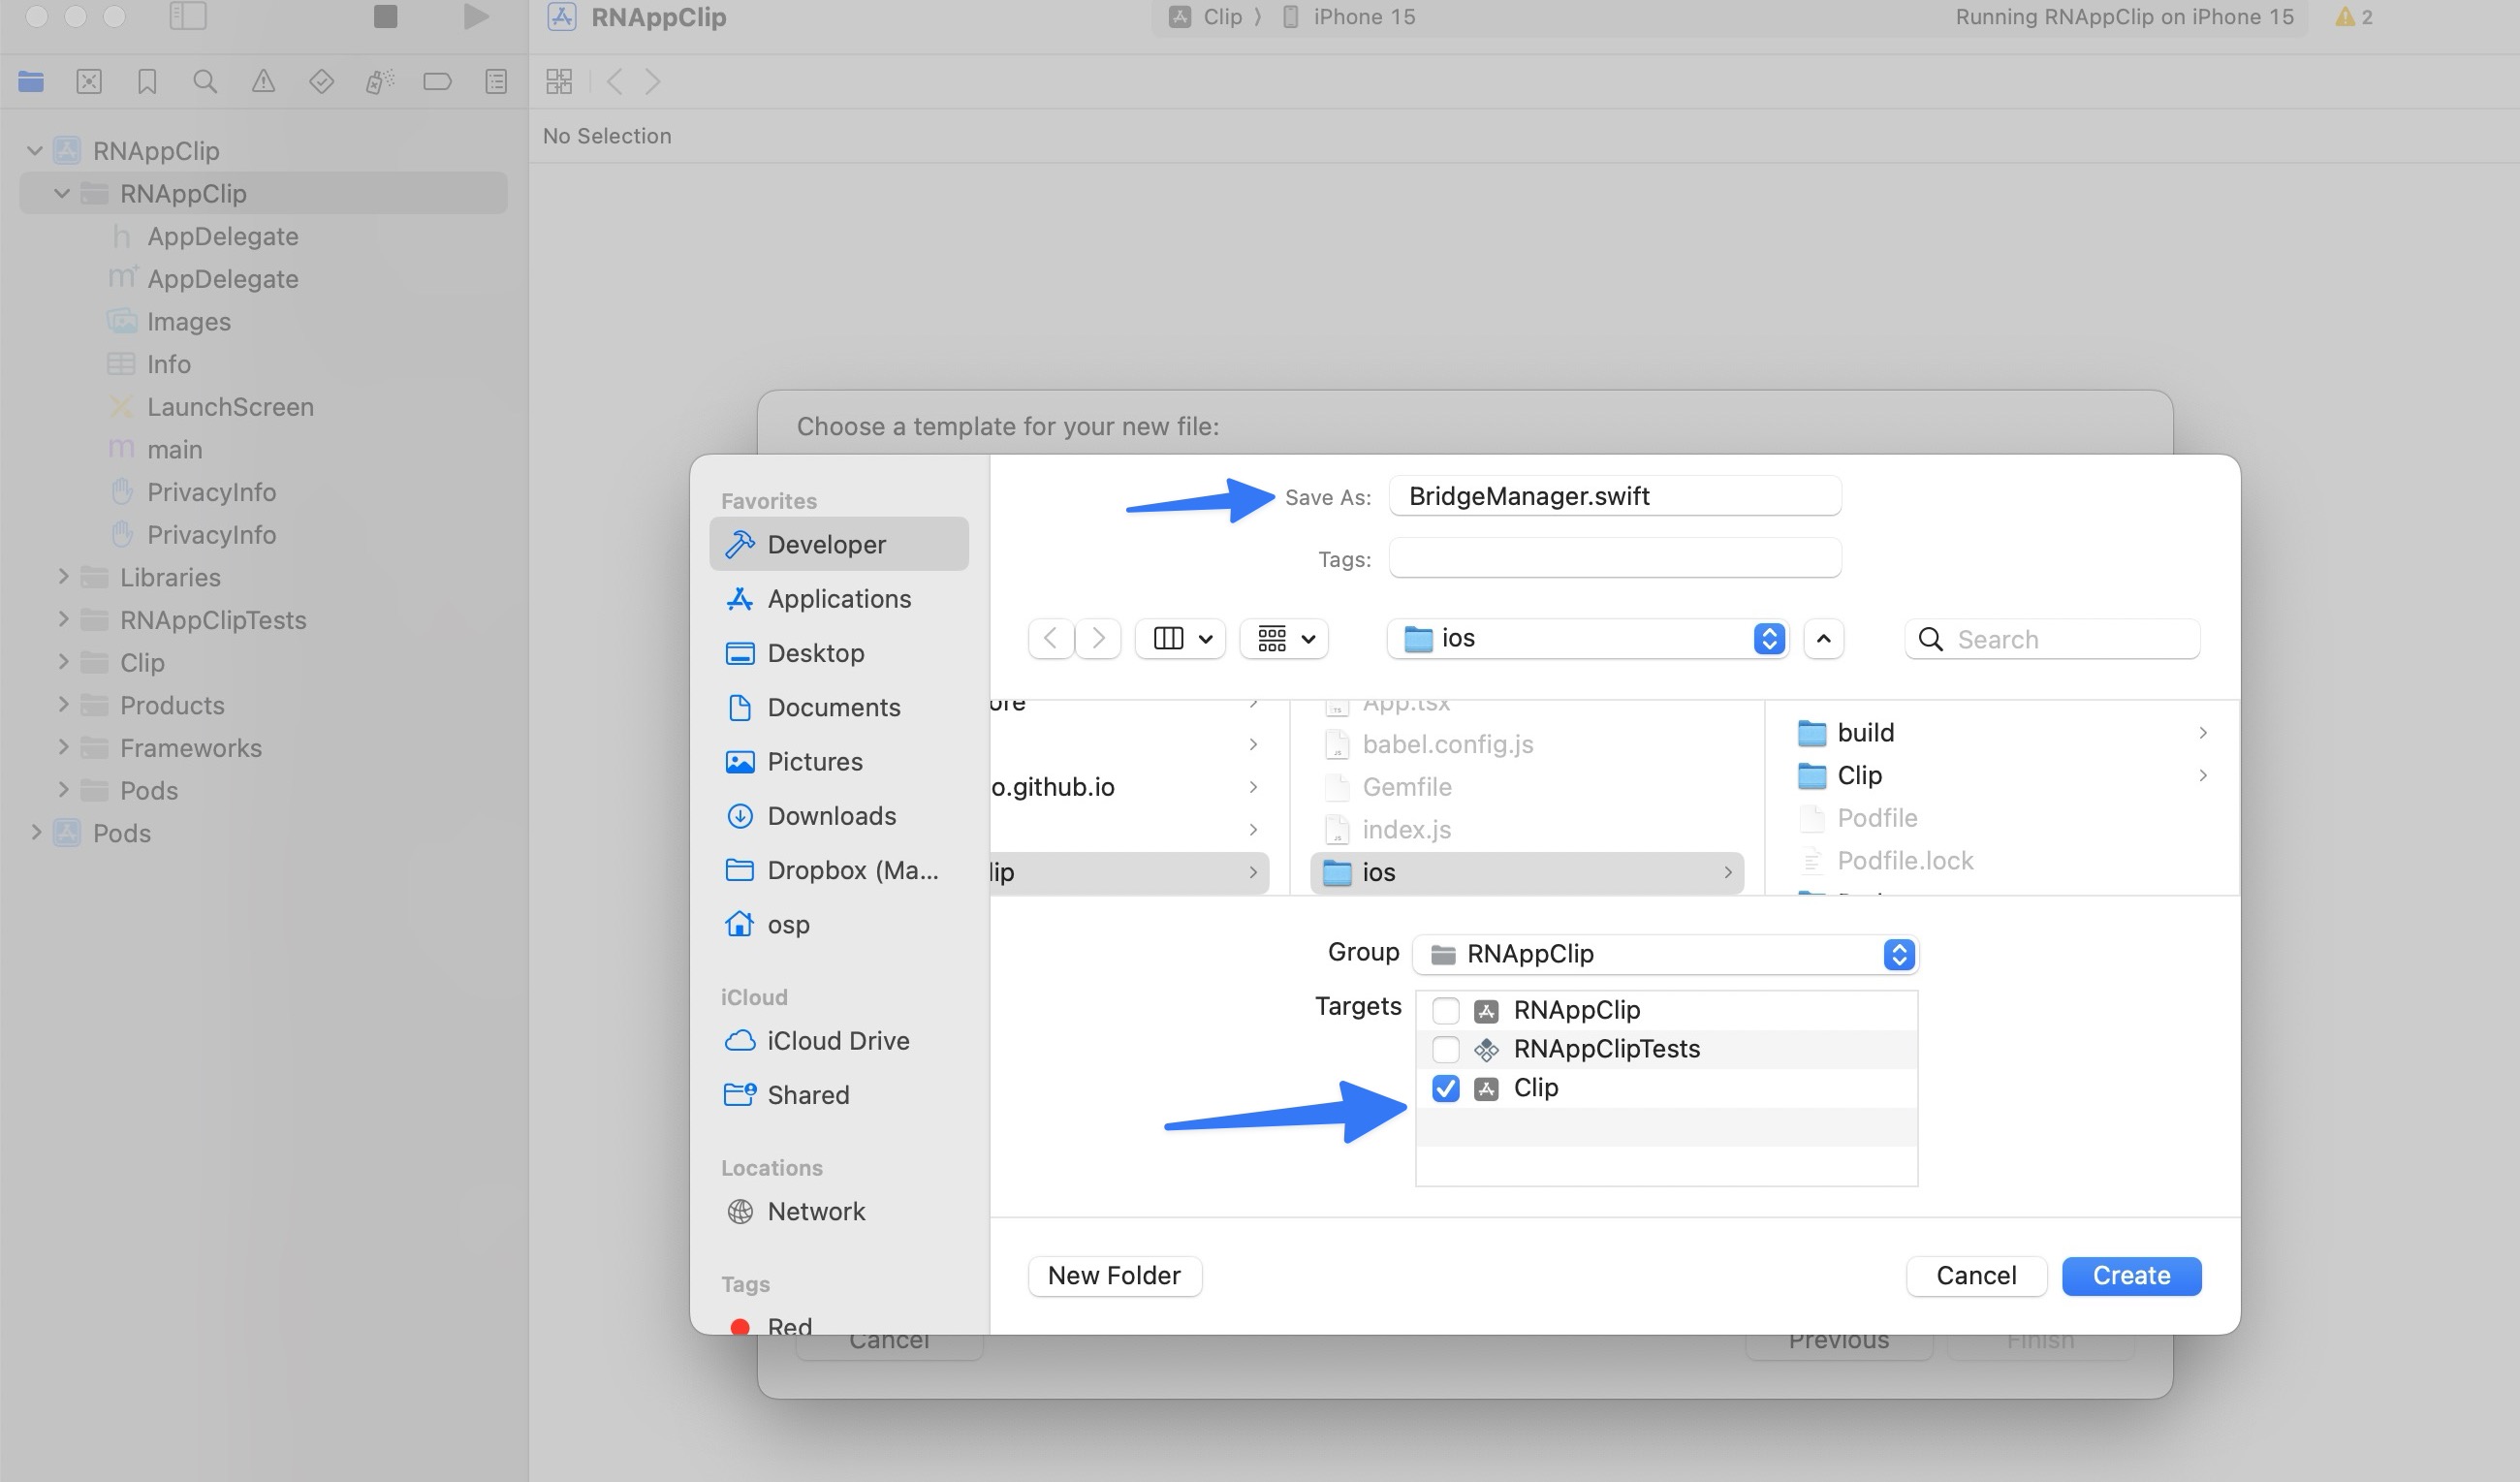
import Foundation
import React
import ReactNativeHost

class BridgeManager: NSObject {
    static let shared = BridgeManager()

    var host: ReactNativeHost?

    public func loadReactNative(launchOptions: [AnyHashable: Any]?) {
      host = ReactNativeHost(self)
    }
}

extension BridgeManager: RNXHostConfig {
  func sourceURL(for bridge: RCTBridge) -> URL? {
        #if DEBUG
          return RCTBundleURLProvider.sharedSettings().jsBundleURL(forBundleRoot: "index.clip")
        #else
            return Bundle.main.url(forResource: "main", withExtension: "jsbundle")
        #endif
    }
}
In order for the DEBUG preprocessor macro to run, we need to add the DEBUG flag into the build settings of the Clip target
AppDelegate.m at the Clip target:import React
import ReactNativeHost
import UIKit
@main
class AppDelegate: UIResponder, UIApplicationDelegate, RNXHostConfig {
var window: UIWindow?
func sourceURL(for bridge: RCTBridge) -> URL? {
return nil
}
func application(
_ application: UIApplication,
didFinishLaunchingWithOptions launchOptions: [UIApplication.LaunchOptionsKey: Any]?
) -> Bool {
BridgeManager.shared.loadReactNative(launchOptions: launchOptions)
// Override point for customization after application launch.
return true
}
// MARK: UISceneSession Lifecycle
func application(
_ application: UIApplication, configurationForConnecting connectingSceneSession: UISceneSession,
options: UIScene.ConnectionOptions
) -> UISceneConfiguration {
// Called when a new scene session is being created.
// Use this method to select a configuration to create the new scene with.
return UISceneConfiguration(
name: "Default Configuration", sessionRole: connectingSceneSession.role)
}
func application(
_ application: UIApplication, didDiscardSceneSessions sceneSessions: Set<UISceneSession>
) {
// Called when the user discards a scene session.
// If any sessions were discarded while the application was not running, this will be called shortly after application:didFinishLaunchingWithOptions.
// Use this method to release any resources that were specific to the discarded scenes, as they will not return.
}
}
RCTRootView (the view that holds RN) into the app clip controllerimport UIKit
import ReactNativeHost
class ViewController: UIViewController {
override func loadView() {
if let host = BridgeManager.shared.host {
self.view = host.view(
moduleName: "clip",
initialProperties: nil
)
}
}
override func viewDidLoad() {
super.viewDidLoad()
// Do any additional setup after loading the view.
}
}
Bundle React Native code and images but modify it so that instead of loading the index.js file it loads index.clip.js. Go to build phases, add new script and copy the contents of the script: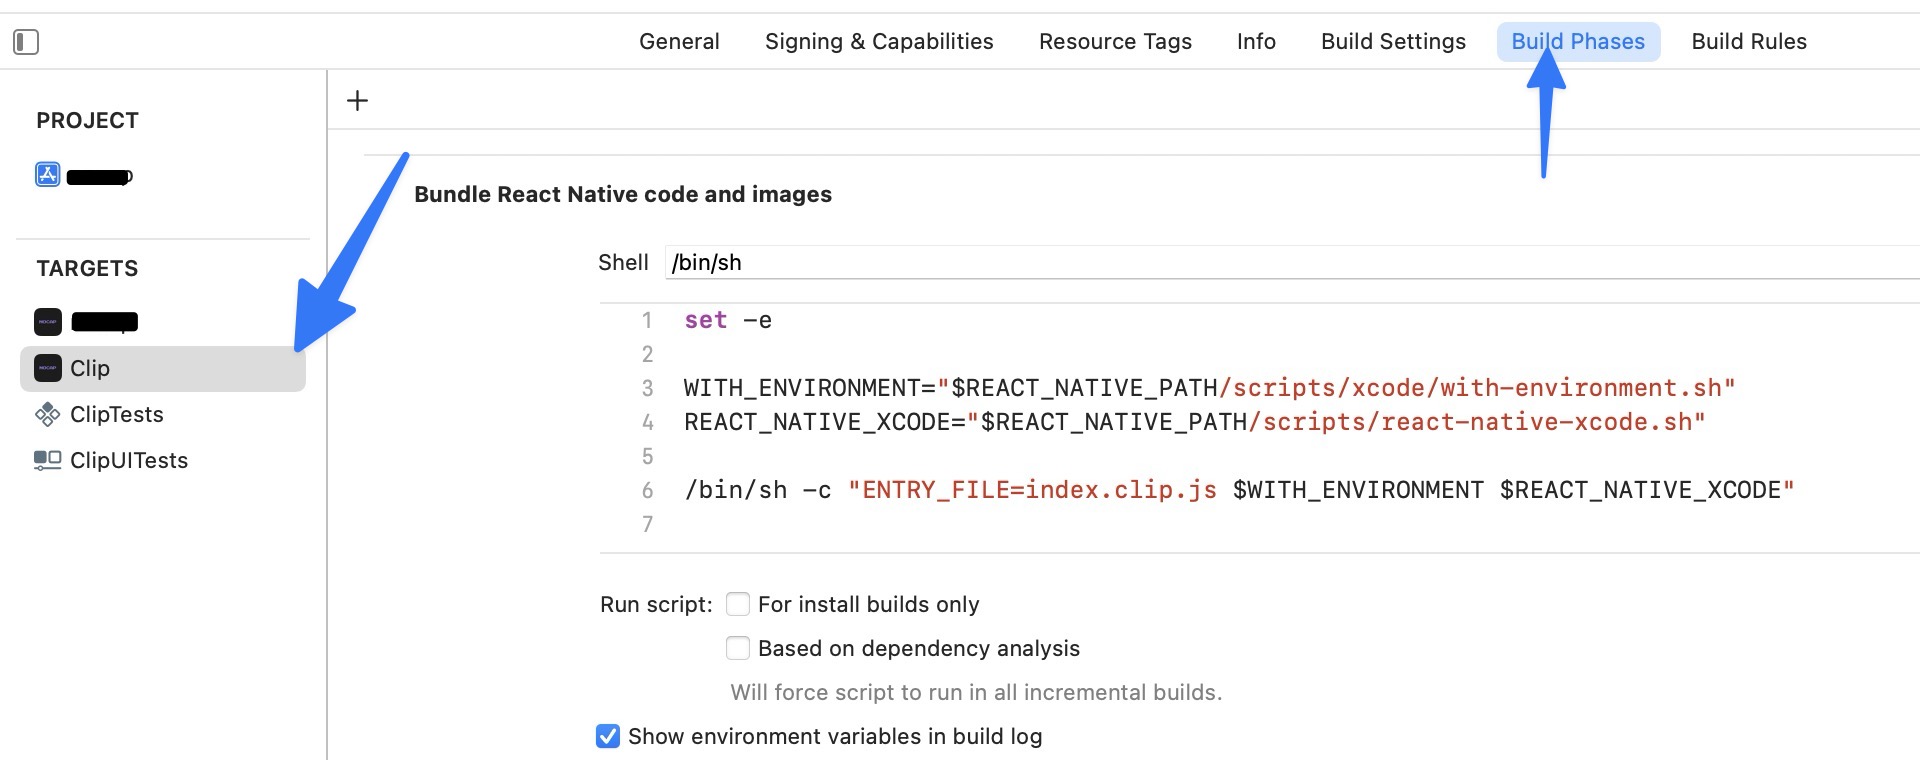
set -e

WITH_ENVIRONMENT="$REACT_NATIVE_PATH/scripts/xcode/with-environment.sh"
REACT_NATIVE_XCODE="$REACT_NATIVE_PATH/scripts/react-native-xcode.sh"

/bin/sh -c "ENTRY_FILE=index.clip.js $WITH_ENVIRONMENT $REACT_NATIVE_XCODE"
User Script Sandboxing on the build settings of the clip target: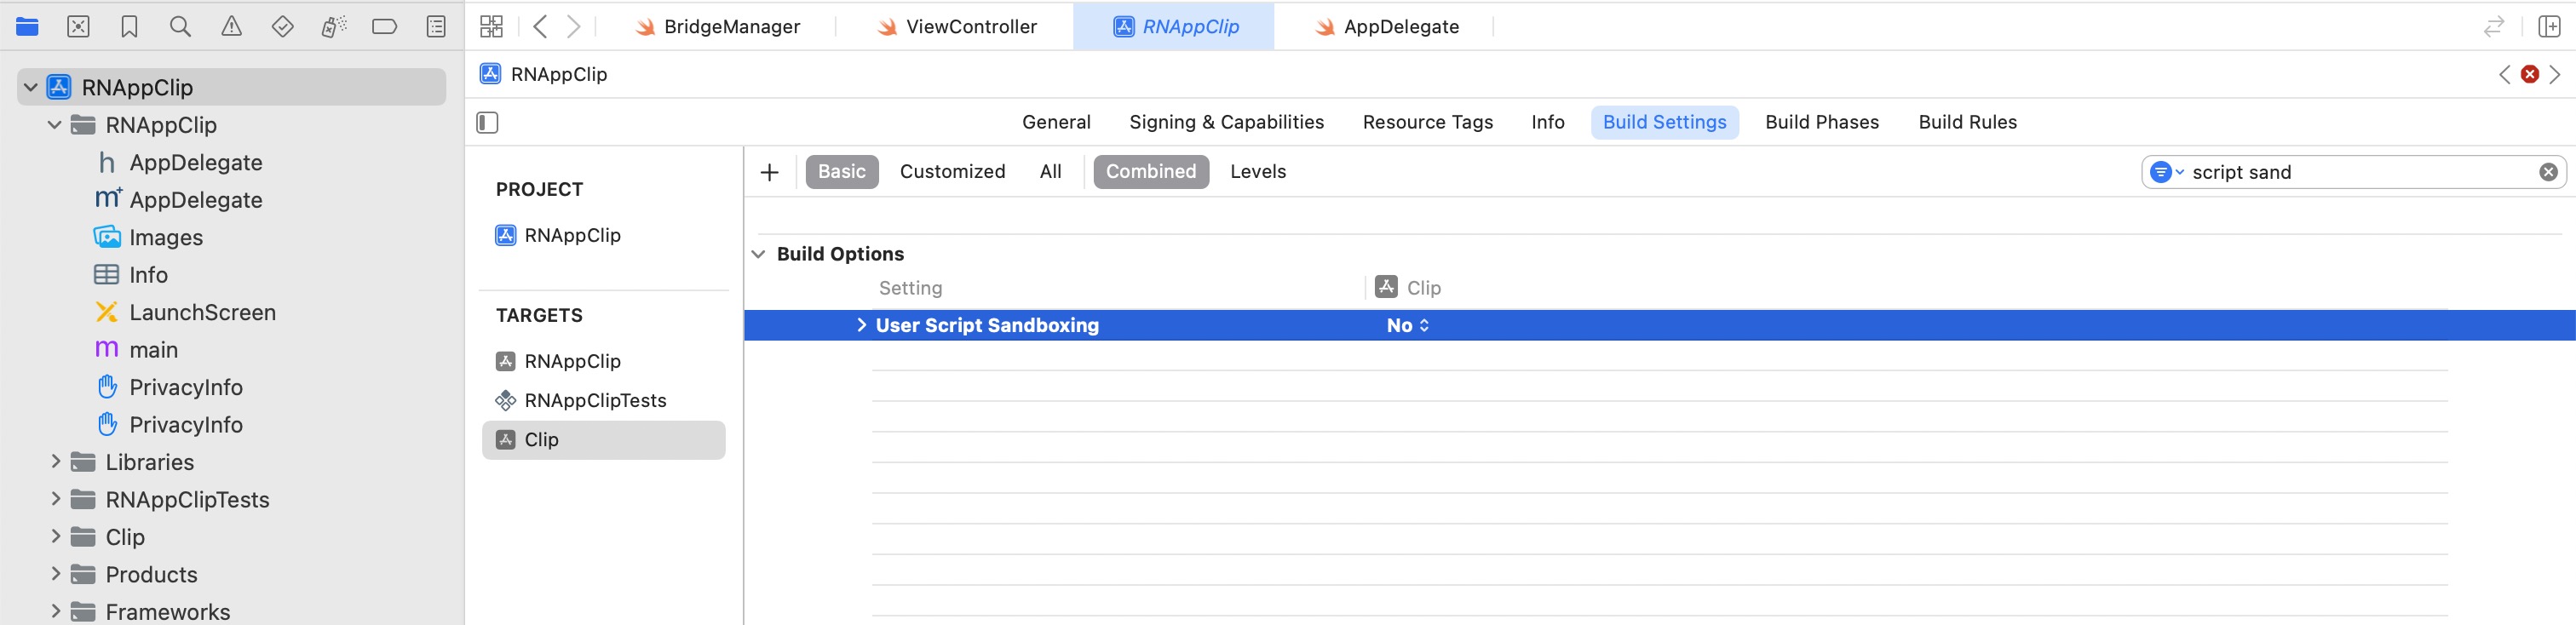
index.clip.js at the root of the projectimport React from "react";
import { AppRegistry, View, Text } from "react-native";
const AppClip = () => (
<View>
<Text>Hello,</Text>
<Text>I'm your AppClip!</Text>
</View>
);
AppRegistry.registerComponent("clip", () => AppClip);
Notice we are registering the component as clip which matches the component being loaded at the ViewController.
That’s it, if everything is configured correctly you should be able to see your app clip loaded. You can find the repo of this app here
 Oscar Franco